
Step 1: Log in
- Navigate to your client area.
- Log in with your credentials.
Step 2: Access the User Management Section
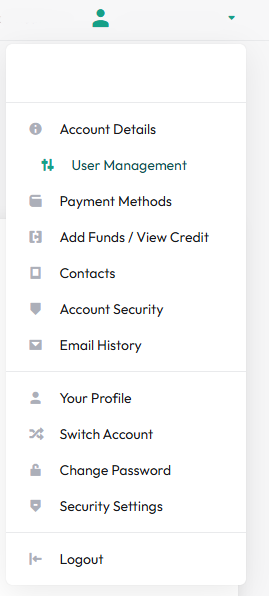
- Once logged in, locate the "User Management" option in the menu.
- Click on "Invite New User" to manage your team.
Step 3: Invite a New Team Member
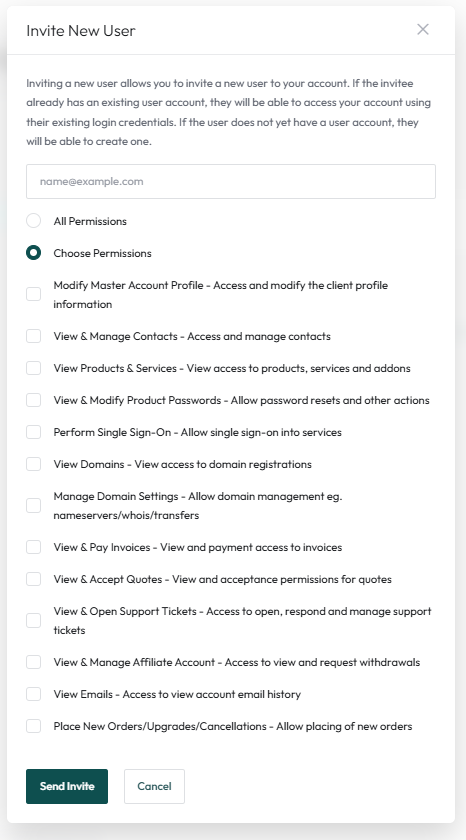
- Add an email address for the Team Member.
- Choose All Permissions to grant all available permissions, or choose Choose Permissions and select the desired permissions.
Step 5: Send the Invitation
- After filling out the required details and selecting permissions, click "Send Invite".
- The invitee will receive an email with a link to accept the invitation.
Step 6: Track Invitation Status
- In the "Team Members" section, you can view the status of sent invitations:
- Pending: The invitee has not yet accepted the invitation.
- Active: The invitee has accepted and is now an active team member.
- If needed, you can resend or cancel an invitation.
Step 7: Manage Existing Team Members
Once a team member is active, you can:
- Edit their roles and permissions.
- Deactivate their account if they no longer need access.
- View their activity logs to monitor actions within the system.
Tips for Team Management
- Use Specific Roles: Assign only the necessary permissions to reduce risks and confusion.
- Regular Reviews: Periodically review roles and permissions to ensure they align with your business needs.
- Audit Activity: Use activity logs to track changes and ensure accountability.
Troubleshooting
- If a team member doesn’t receive the invitation, ask them to check their spam or junk folder.
- Ensure the email address is entered correctly.
- Contact your system administrator if issues persist.
By following these steps, you can efficiently add team members to your WHMCS account and ensure secure and collaborative management of your business operations.